Chill Winter Set
A bit of inspiration behind the name:
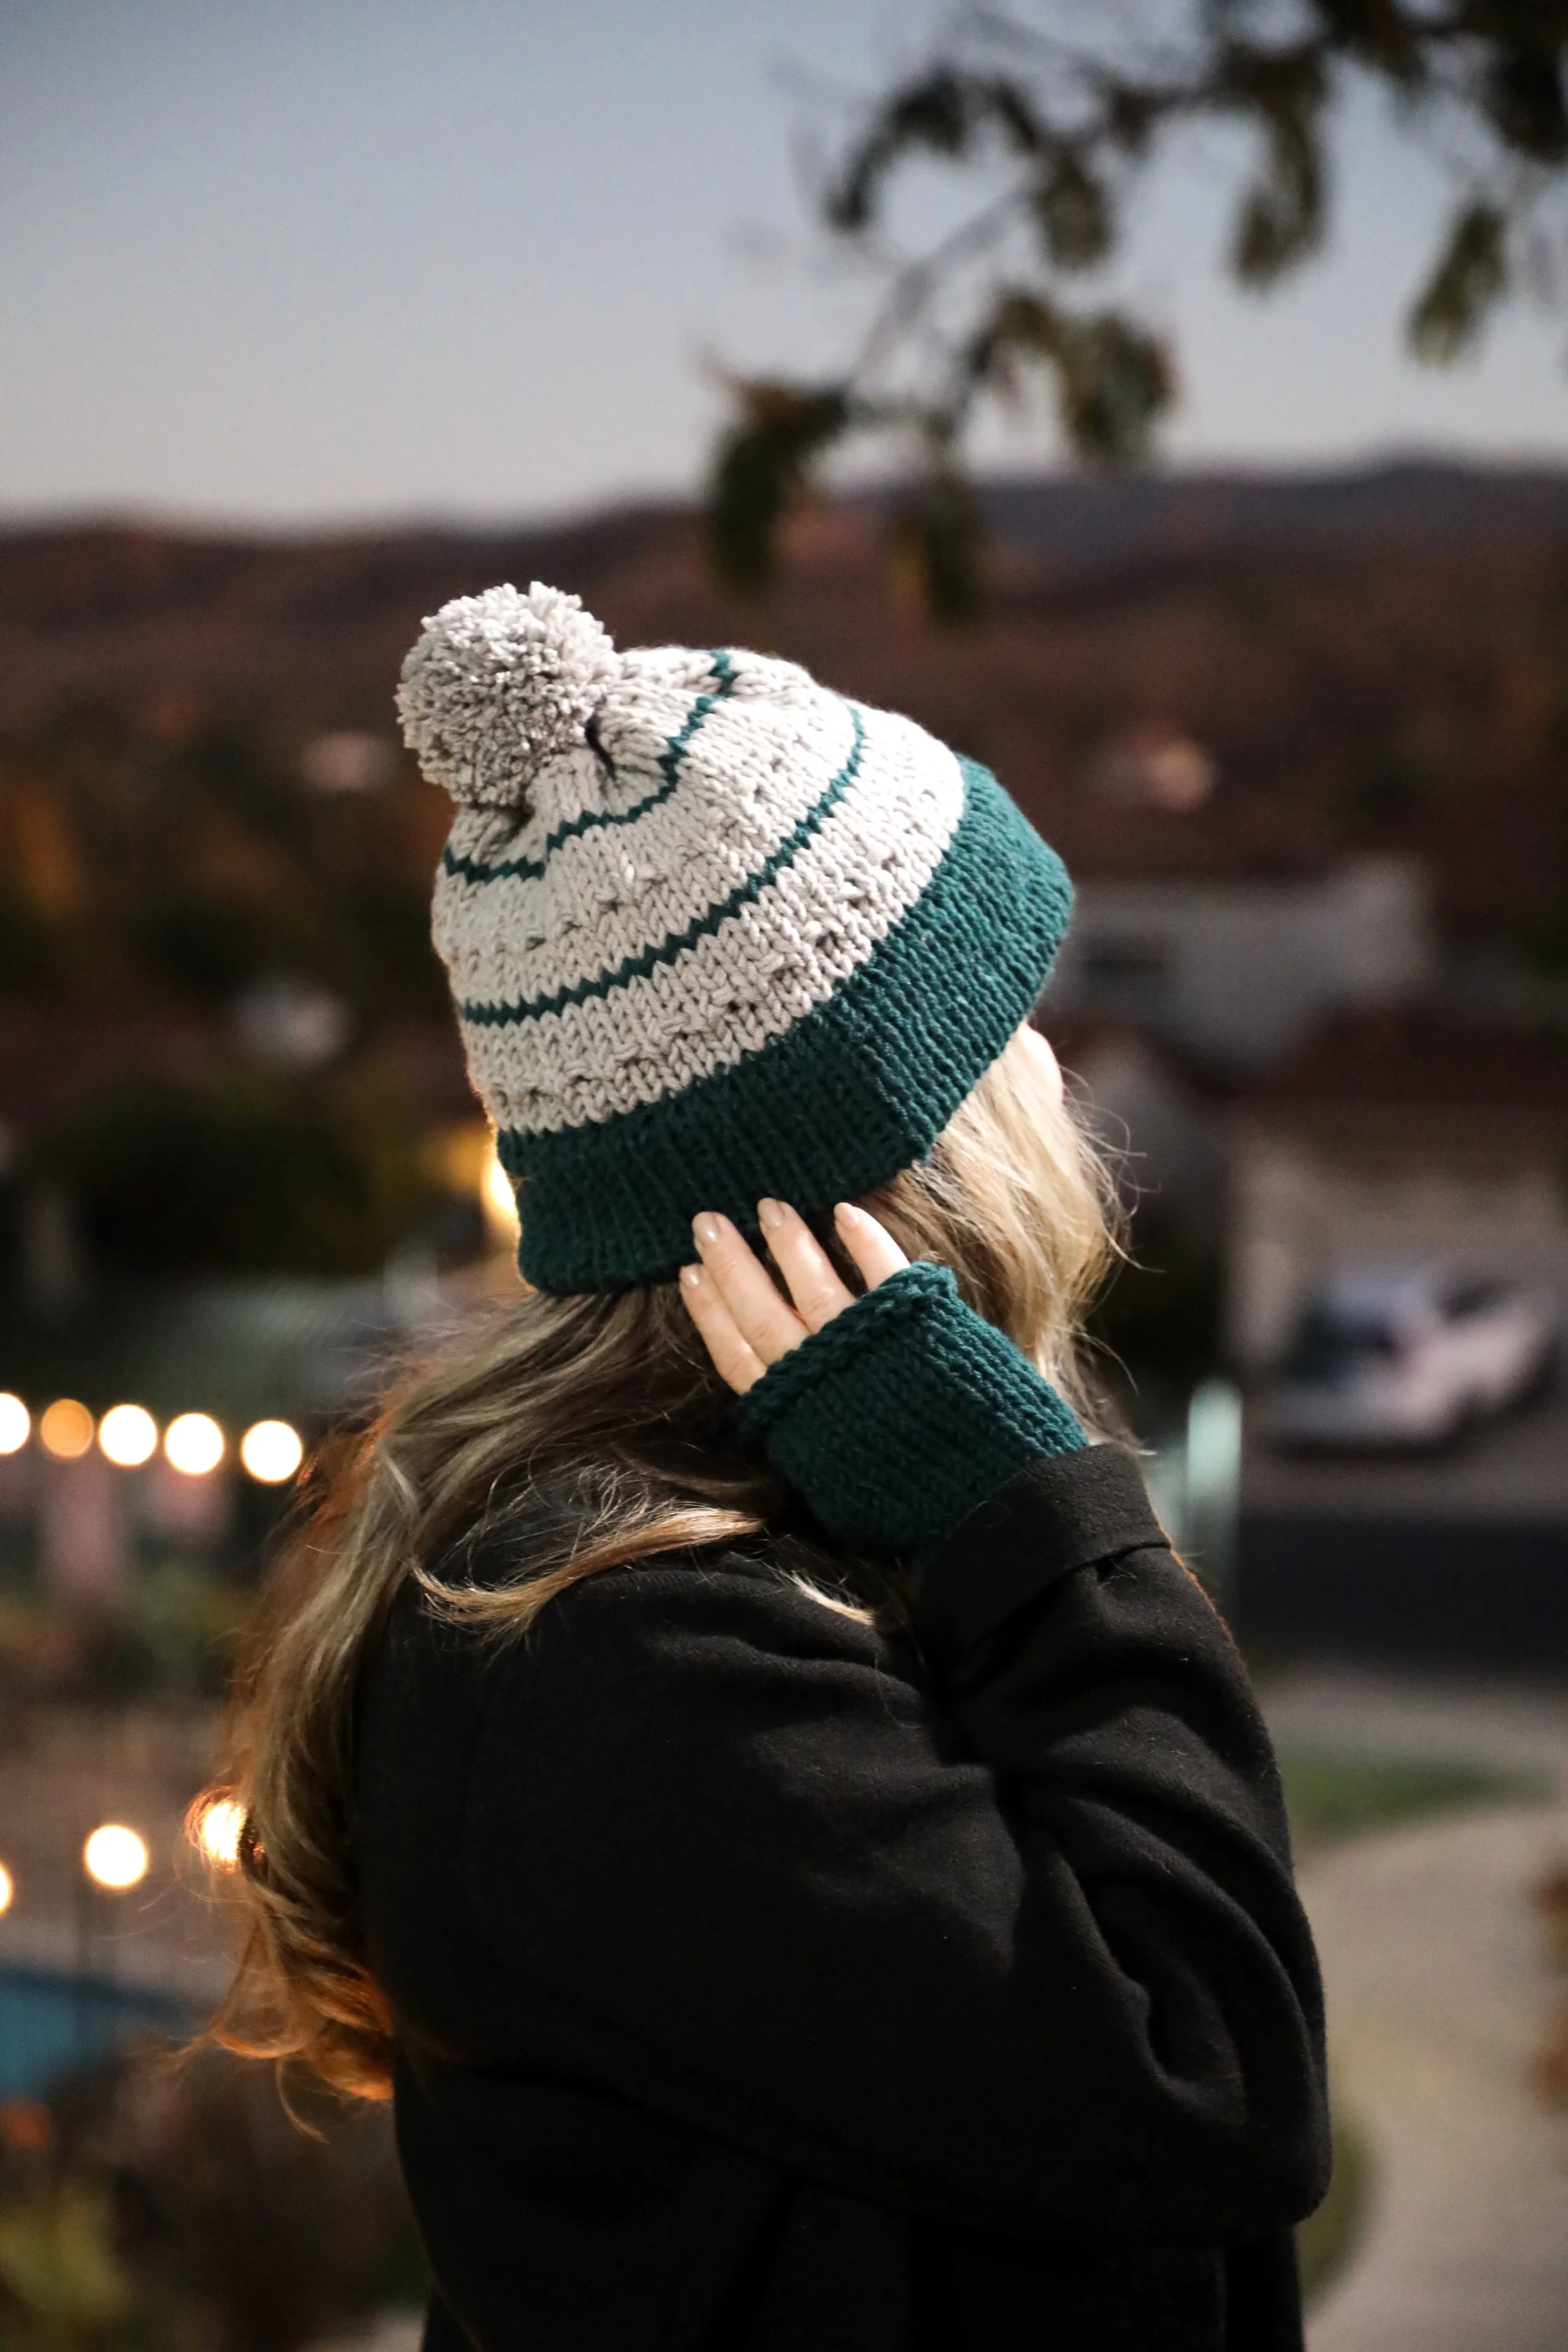
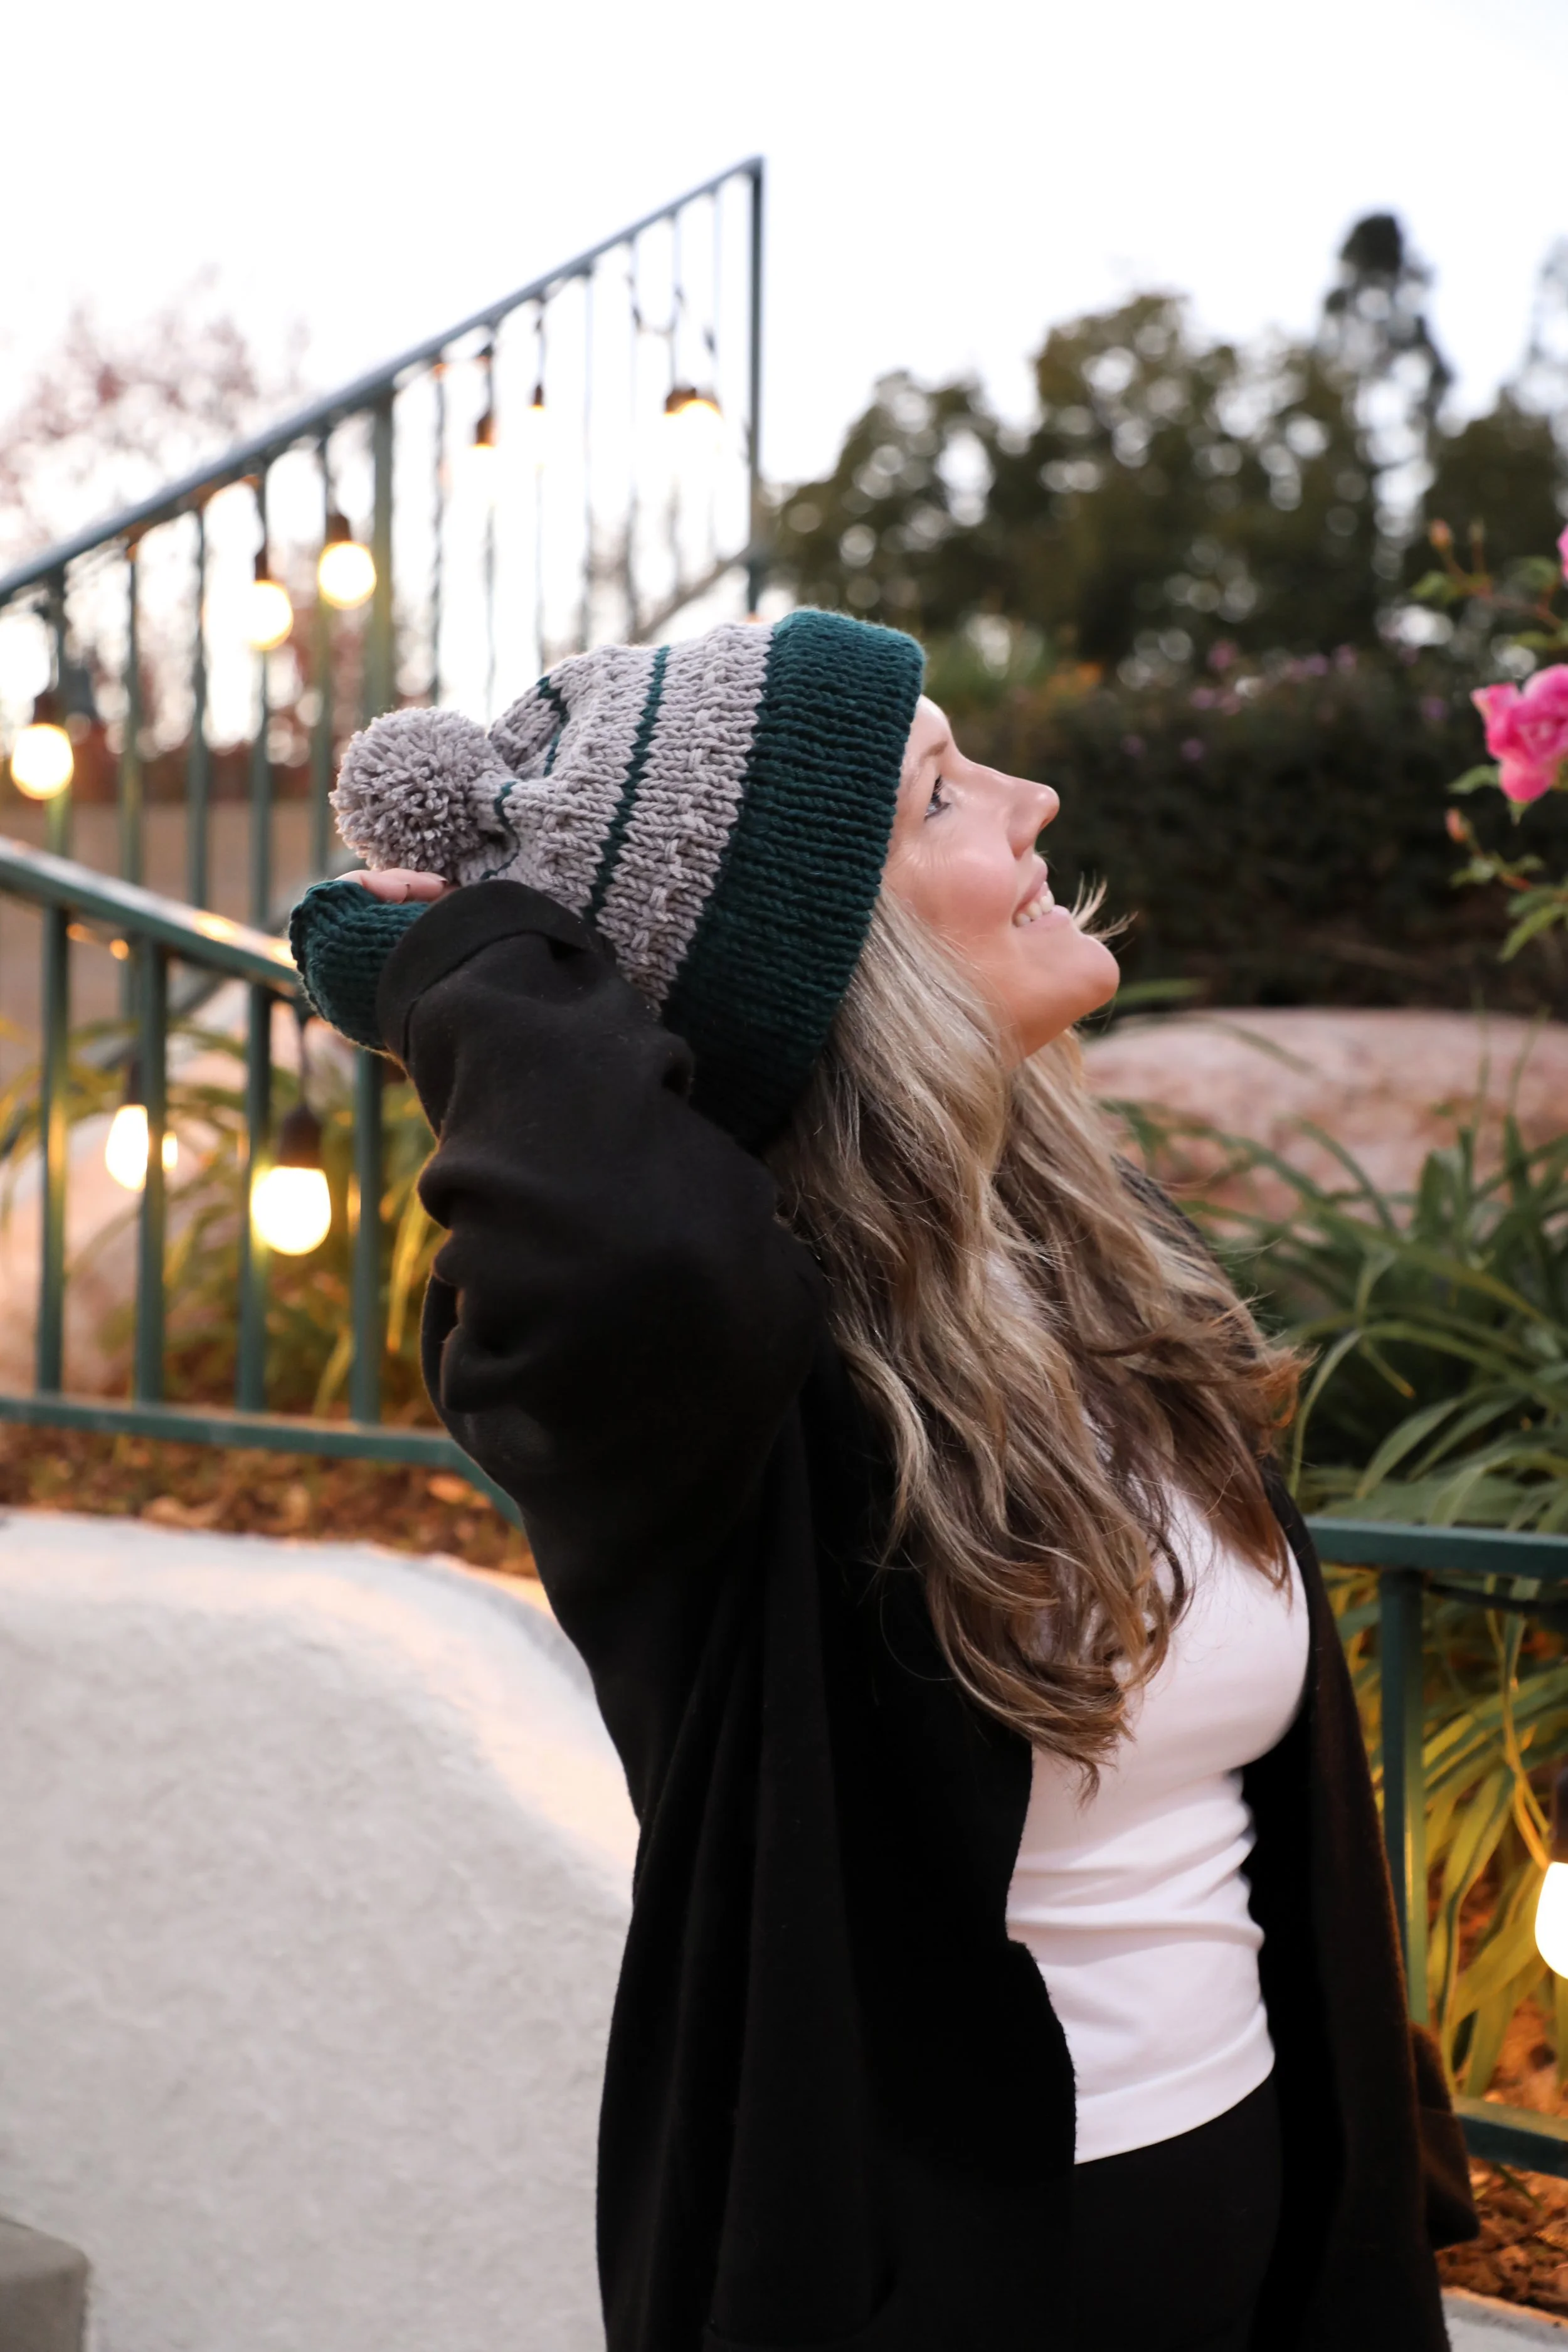
Lately, the weather has been extra brrr!! Being up in the early a.m. and out and about in the evening is calling for all the layers! This set features a double brim to keep you ears nice and toasty for when you’re going along your day and need that extra bit of a yarn hug!! Fingerless gloves are a must for me as the weather dips. With these gloves I can go about my day doing all the typing and knitting I need to get done while still being able to feel my fingers haha, if you too get extra cold, we’re twins!!
Mix and match your favorite colors to make this set perfect for you!
METHOD Knitting
DIFFICULTY
Beginner Plus
SIZES Child-Adult
DESCRIPTION
As we enter the brrrr months, it calls for something extra toasty like this double brim and fingerless gloves set. The hat uses a quick decrease method for easy shaping and the gloves are worked flat.
YARN
Lion Brand Yarn, Color Theory, #4, 246yd/225m, 3.5oz/100g, 100% Acrylic
Shown in:
Color A: Peacock - 1
Color B: Satelite - 1
Skeins needed: 2 (A + B)
NEEDLE
US 10.5 (6.5 mm) needles, 16” (40 cm) circulars
NOTIONS
Yarn Needle for weaving in ends, Stitch Marker
Optional: 3” (7.6 cm) pom maker.
GAUGE
Yarn held double throughout the pattern.
14 sts x 17 rounds = 4” (10 cm) of stockinette
PROJECT TIMELINE:
I love a quick gift and project! This hat can be knit in morning and the gloves are even quicker! Keep your whole family warm within a week of knitting. For littler hands the gloves and hat can easily be sized down. Reducing your cast on by the amount of sts per inch that makes this hat too big, makes it fit any head. Easily shortern the rows till the crown to adjust height. Do the same for the gloves, ie. 1”(2.5cm) smaller, take away 3 sts and your glove circumference will be an inch smaller. Then just simply remove length, a few rows should do it :)
NEEDLE + YARN INFO:
I used the oh so lovely and soft Color Theory yarn - held double. This basically makes it a bulky yarn so depending on your gauge, you can also sub Hue and Me. I know I will make one of those for sure!!
Fingerless gloves are my fave because if you’re working, you can still type and operate your phone!! Multi tasking :)
NOTES
Written in US Terms.
Cut your yarns between color changes.
The hat brim is doubled.
The photo tutorial/video of the hat brim is using a single strand of yarn because it was easier to see the steps involved.
This hat is worked bottom-up and in the round.
With the rapid decrease at the crown this hat is quick and easy to remake over and over again.
The cinched up crown pairs perfectly with a fluffy pom!
Gloves are worked flat.
GAUGE
**Please check your gauge before you start this pattern to match the finished measurements for this pattern:
It’s best to make your swatch slightly bigger than what the pattern states it should measure so you can measure it in the center of your square, getting an accurate reading. You can do this by adding 2 additional stitches and working 2 additional rows. Do not count the first and last stitch in your measurement or the first and last row.
Needle Size Suggestions:
If your swatch has less stitches, swatch again using a smaller needle.
If your swatch has more stitches, swatch again using a larger needle.
Finished Measurements
Head Circ.
Adult: Fits 20-24” (50-60 cm)
Width (laid flat)
10” (25 cm)
Height
8.5” (21 cm)
Glove Length
6” (15 cm)
Stitches to Know
k. Knit
k2tog Knit two stitches together
p. Purl
RS. Right Side
WS. Wrong Side
Techniques:
Garter Stitch, knit every row.
Stockinette, knit the RS rows, purl the WS rows.
**This Pattern is a copyright of Whistle and Wool© so you may not copy, alter, adjust, share, record, redistribute or resell my Pattern. No tutorials or any kind of demonstrations may be made using any information contained in my Pattern. I do not mind if you wish to sell a completed HANDMADE item and you are a small independently owned business, however, you do not have permission to use ANY of my photos. If you do sell a completed item, please list credit of the design belonging to me, Whistle and Wool and a link to my shop. www.WhistleandWool.com
Hat Pattern
Cast on 60 sts with Color A and join in the round. Add a marker for the beginning of the round.
Row 1-23: Knit. [60 sts]
Should measure 5” (14 cm).
Next we will fold the brim to make it doubled.
Row 24: Find the first stitch of the cast on row and add a marker for a good visual (See Pic 1). Fold the cast on row to the inside of the hat (WS’s together) to line up the markers (See Pic 2). Knit the 1 sts together (See Pic 3). Continue knitting parallel stitches together until you’ve joined the cast on row to the current row.
I made a video of this process, please visit my YouTube Channel.
Round 25-27: Switch to Color B, knit.
Round 28: (k1, p1) for the round.
Round 29-31: Knit.
Round 32: Switch to Color A, knit.
Round 33-39: Repeat Rounds 25-31, once more.
Round 40-45: Repeat Rounds 25-30.
Round 46: (Decrease) K2tog for the round. [30 sts]
Cinching up the Crown
Step 1: Cut your working yarn, leaving a long tail, approx. 12” (30 cm). Thread your yarn needle onto it.
Step 2: Slip the remaining stitches purlwise onto your yarn needle.
Step 3: Cinch up the crown, then weave through the remaining stitches a few more times to secure them.
Weave in all your ends.
(Optional) Attach a yarn pom pom. I used a 3” (7.5 cm) pom maker. Follow the instructions on the package and secure it on the inside of the hat with a knot.
Voila! You’re done!
Gloves - Make 2
Cast on. 20 sts using Color A.
Row 1-2: Work in Garter Stitch.[20 sts]
Row 3-24: Work in Stockinette.
Row 25-26: Work in Garter Stitch.
Row 27: Bind of using a k2tog method for stretch.
Cut yarn leaving a 20” (50 cm) length tail for sewing up the glove.
Sewing up the Gloves
Step 1: Starting at the bind off which is the wrist section of the glove, Whip Stitch up 2.5” (6 cm) of the glove.
Step 2: Carry the yarn up 2.25” (5.5 cm) by weaving the yarn up the inside of the glove, then Whip Stitch the remaining section of the glove.
Step 3: Weave in all the ends.


